

Introduction
Often, you will need to connect to more than one data source. Sometimes, this is for security reasons.
An example of this is the storage of credit card information. You may wish to store the data elements in multiple data sources. If one of the data sources is compromised the data retrieved is useless without the data from other data sources.
In this article, we will configure multiple data sources in Spring Boot and JPA.
Project Setup
Databases
We will use MySQL for our database server.
The credit card scenario described above, will use the following three databases:
- Member database(memberdb): Stores personal details of cardholders which include their full name and member id.
- Cardholder database(cardholderdb): Stores cardholder details which include the member id and credit card number.
- Card database(carddb): Stores the credit card information which includes the owner’s full name and the credit card expiration date.
Since we are spreading the credit card data across three databases, all three would need to be compromised for a security risk.
NOTE: This scenario is for an example of using multiple data sources with Spring Boot. This article is not a security recommendation.
Dependencies
To support MySQL, our classpath must include the MySQL database connector dependency.
Here is the list of Maven dependencies.
- <dependencies>
- <dependency>
- <groupId>org.springframework.boot</groupId>
- <artifactId>spring-boot-starter-data-jpa</artifactId>
- </dependency>
- <dependency>
- <groupId>mysql</groupId>
- <artifactId>mysql-connector-java</artifactId>
- <scope>runtime</scope>
- </dependency>
- <dependency>
- <groupId>org.projectlombok</groupId>
- <artifactId>lombok</artifactId>
- <optional>true</optional>
- </dependency>
- <dependency>
- <groupId>org.springframework.boot</groupId>
- <artifactId>spring-boot-starter-test</artifactId>
- <scope>test</scope>
- </dependency>
- <dependency>
- <groupId>commons-dbcp</groupId>
- <artifactId>commons-dbcp</artifactId>
- <version>${commons.dbcp.version}</version>
- </dependency>
- </dependencies>
Packaging
The project packaging structure is very important when dealing with multiple data sources.
The data models or entities belonging to a certain datastore must be placed in their unique packages.
This packaging strategy also applies to the JPA repositories.
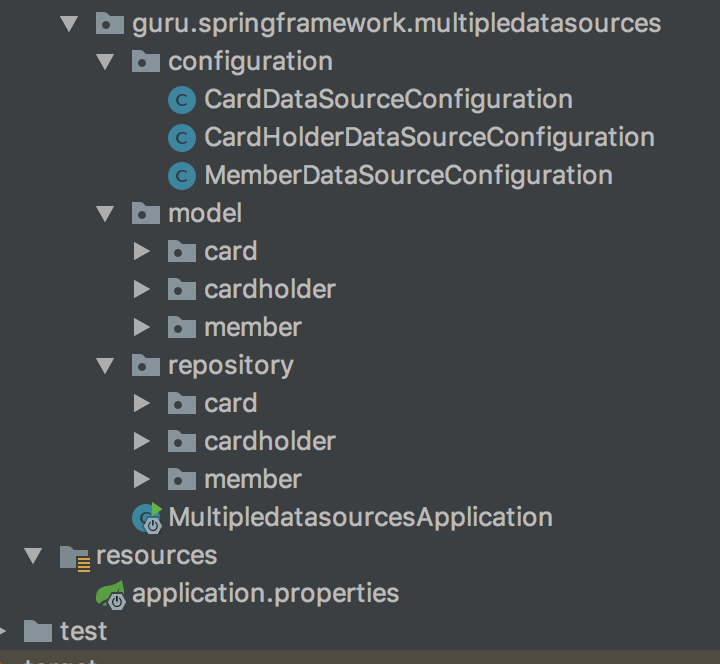
As you can see above, we have defined a unique package for each of the models and repositories.
We have also created Java configuration files for each of our data sources:
- guru.springframework.multipledatasources.configuration.CardDataSourceConfiguration
- guru.springframework.multipledatasources.configuration.CardHolderDataSourceConfiguration
- guru.springframework.multipledatasources.configuration.MemberDataSourceConfiguration
Each data source configuration file will contain its data source bean definition including the entity manager and transaction manager bean definitions.
Database Connection Settings
Since we are configuring three data sources we need three sets of configurations in the application.propertiesfile.
Here is the code of the application.properties file.
- #Store card holder personal details
- app.datasource.member.url=jdbc:mysql://localhost:3306/memberdb?createDatabaseIfNotExist=true
- app.datasource.member.username=root
- app.datasource.member.password=P@ssw0rd#
- app.datasource.member.driverClassName=com.mysql.cj.jdbc.Driver
- #card number (cardholder id, cardnumber)
- app.datasource.cardholder.url=jdbc:mysql://localhost:3306/cardholderdb?createDatabaseIfNotExist=true
- app.datasource.cardholder.username=root
- app.datasource.cardholder.password=P@ssw0rd#
- app.datasource.cardholder.driverClassName=com.mysql.cj.jdbc.Driver
- #expiration date (card id, expiration month, expiration year)
- app.datasource.card.url=jdbc:mysql://localhost:3306/carddb?createDatabaseIfNotExist=true
- app.datasource.card.username=root
- app.datasource.card.password=P@ssw0rd#
- app.datasource.card.driverClassName=com.mysql.cj.jdbc.Driver
- spring.jpa.hibernate.ddl-auto=update
- spring.jpa.generate-ddl=true
- spring.jpa.show-sql=true
- spring.jpa.database=mysql
Data Source Configuration
It is important to note that during the configuration of multiple data sources, one data source instance must be marked as the primary data source.
Else the application will fail to start-up because Spring will detect more than one data source of the same type.
Steps
In this example, we will mark the member data source as our primary data source.
Here are the data source configuration steps.
- Data source bean definition
- Entities
- Entity Manager Factory bean definition
- Transaction Management
- Spring Data JPA Repository custom settings
Data Source Bean Definition
To create a data source bean we need to instantiate the org.springframework.boot.autoconfigure.jdbc.DataSourceProperties class using the data source key specified in the application.properties file. We are going to use this DataSourceProperties object to get a data source builder object.
The data source builder object uses the database properties found in the application.properties file to create a data source object.
The following code shows the bean definitions of our data sources.
Primary Data Source
- @Bean
- @Primary
- @ConfigurationProperties("app.datasource.member")
- public DataSourceProperties memberDataSourceProperties() {
- return new DataSourceProperties();
- }
- @Bean
- @Primary
- @ConfigurationProperties("app.datasource.member.configuration")
- public DataSource memberDataSource() {
- return memberDataSourceProperties().initializeDataSourceBuilder()
- .type(HikariDataSource.class).build();
- }
Secondary Data Sources
- /*cardholder data source */
- @Bean
- @ConfigurationProperties("app.datasource.cardholder")
- public DataSourceProperties cardHolderDataSourceProperties() {
- return new DataSourceProperties();
- }
- @Bean
- @ConfigurationProperties("app.datasource.cardholder.configuration")
- public DataSource cardholderDataSource() {
- return cardHolderDataSourceProperties().initializeDataSourceBuilder()
- .type(BasicDataSource.class).build();
- }
- /*card data source*/
- @Bean
- @ConfigurationProperties("app.datasource.card")
- public DataSourceProperties cardDataSourceProperties() {
- return new DataSourceProperties();
- }
- @Bean
- @ConfigurationProperties("app.datasource.card.configuration")
- public DataSource cardDataSource() {
- return cardDataSourceProperties().initializeDataSourceBuilder()
- .type(BasicDataSource.class).build();
- }
Entities
Since we are going to store Member, Card, and Cardholder objects we must declare them as JPA entities using @Entity annotation. These entities will be mapped to relational database tables by JPA.
We must tell Spring which tables belong to a certain data source. There are two ways of achieving this. You can use the ‘schema‘ field of the @Table annotation as indicated in the code snippet below at line 2.
- @Entity
- @Table(name = "member", schema = "memberdb")
- @Data
- public class Member {
- @Id
- @GeneratedValue(strategy = GenerationType.AUTO)
- private Long id;
- private String name;
- private String memberId;
- }
Or you may link the entities to their data source is via the org.springframework.boot.orm.jpa.EntityManagerFactoryBuilder class method packages(). We can pass the packages or classes to be scanned for @Entity annotations in this method.
Spring will use this setting to map these entities to tables which will be created in the data source set through the datasource() method of this EMF builder class.
See code snippet in the next section.
Entity Manager Factory Bean Definition
Our application will be using Spring Data JPA for data access through its repository interfaces that abstract us from the EM(Entity Manager). We use the EMF bean to obtain instances of EMs which interact with the JPA entities.
Since, we have three data sources we need to create an EM for each data source.
This is done by providing the EMF builder class with reference to the data source and location of entities.
In our example, we will define this EMF using the org.springframework.orm.jpa.LocalContainerEntityManagerFactoryBean class like this.
- /*Primary Entity manager*/
- @Primary
- @Bean(name = "memberEntityManagerFactory")
- public LocalContainerEntityManagerFactoryBean memberEntityManagerFactory(EntityManagerFactoryBuilder builder) {
- return builder
- .dataSource(memberDataSource())
- .packages(Member.class)
- .build();
- }
- /*Secondary Entity Managers*/
- @Bean(name = "cardHolderEntityManagerFactory")
- public LocalContainerEntityManagerFactoryBean cardHolderEntityManagerFactory(
- EntityManagerFactoryBuilder builder) {
- return builder
- .dataSource(cardholderDataSource())
- .packages(CardHolder.class)
- .build();
- }
- @Bean(name = "cardEntityManagerFactory")
- public LocalContainerEntityManagerFactoryBean cardEntityManagerFactory(
- EntityManagerFactoryBuilder builder) {
- return builder
- .dataSource(cardDataSource())
- .packages(Card.class)
- .build();
- }
Transaction Management
The bean definition of a transaction manager requires a reference to the entity manager factory bean. We will to use the @Qualifier annotation to auto-wire the entity manager specific to the data source’ s transaction manager.
A transaction manager is needed for each data source.
The following is a snippet of code showing the member data source transaction manager bean definition.
- @Primary
- @Bean
- public PlatformTransactionManager memberTransactionManager(
- final @Qualifier("memberEntityManagerFactory") LocalContainerEntityManagerFactoryBean memberEntityManagerFactory) {
- return new JpaTransactionManager(memberEntityManagerFactory.getObject());
- }
JPA Repository Configuration
Since we are going to have multiple data sources we must provide the specific information for each data source repository using Spring’ s @EnableJpaRepositoriesannotation. In this annotation, we are going to set the reference to an entity manager, the repositories location and the reference to the transaction manager.
Below is the ‘member’ data source’s JPA repository settings.
- @Configuration
- @EnableTransactionManagement
- @EnableJpaRepositories(basePackages = "guru.springframework.multipledatasources.repository.member",
- entityManagerFactoryRef = "memberEntityManagerFactory",
- transactionManagerRef= "memberTransactionManager"
- )
- public class MemberDataSourceConfiguration { .... }
Line number 3:
basePackages: We use this field to set the base package of our repositories. For instance, for the member data source, it must point to the package guru.springframework.multipledatasources.repository.member
Line number 4:
entityManagerFactoryRef: We use this field to reference the entity manager factory bean defined in the data source configuration file. It is important to take note of the fact that the entityManagerFactoryRef value must match the bean name (if specified via the name field of the @Bean annotation else will default to method name) of the entity manager factory defined in the configuration file.
Line number 5:
transactionManagerRef: This field references the transaction manager defined in the data source configuration file. Again it is important to ensure that the transactionManagerRef value matches with the bean name of the transaction manager factory.
Complete Data Source Configuration File
Below is the complete data source configuration for our primary data source(member database). The complete card and cardholder configuration files are available on GitHub. They are similar to this one except that they are secondary data sources.
- @Configuration
- @EnableTransactionManagement
- @EnableJpaRepositories(basePackages = "guru.springframework.multipledatasources.repository.member",
- entityManagerFactoryRef = "memberEntityManagerFactory",
- transactionManagerRef= "memberTransactionManager"
- )
- public class MemberDataSourceConfiguration {
- @Bean
- @Primary
- @ConfigurationProperties("app.datasource.member")
- public DataSourceProperties memberDataSourceProperties() {
- return new DataSourceProperties();
- }
- @Bean
- @Primary
- @ConfigurationProperties("app.datasource.member.configuration")
- public DataSource memberDataSource() {
- return memberDataSourceProperties().initializeDataSourceBuilder()
- .type(HikariDataSource.class).build();
- }
- @Primary
- @Bean(name = "memberEntityManagerFactory")
- public LocalContainerEntityManagerFactoryBean memberEntityManagerFactory(EntityManagerFactoryBuilder builder) {
- return builder
- .dataSource(memberDataSource())
- .packages(Member.class)
- .build();
- }
- @Primary
- @Bean
- public PlatformTransactionManager memberTransactionManager(
- final @Qualifier("memberEntityManagerFactory") LocalContainerEntityManagerFactoryBean memberEntityManagerFactory) {
- return new JpaTransactionManager(memberEntityManagerFactory.getObject());
- }
- }
Important Points to note:
entity manager factory bean: Please make sure that you are referencing the correct data source when creating the entity manager factory bean otherwise you will get unexpected results.
transaction manager bean: To ensure that you have provided the correct entity manager factory reference for the transaction manager, you may use the @Qualifier annotation.
For example, the transaction manager of the ‘member’ data source will be using the entity manager factory bean with the name “memberEntityManagerFactory”.
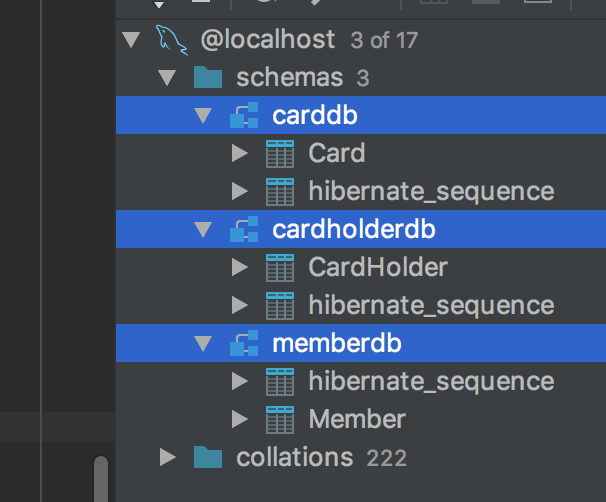
Testing our application
After running the application, the schemas will be updated.
In this example, only one table for each datasource is created.
Spring Boot Test Class
The test class in the code snippet below contains test methods for each data source.
In each method, we are creating an object and persisting it to the database using the Spring Data JPA repository.
To verify, we check if that data is present in the database.
- @RunWith(SpringRunner.class)
- @SpringBootTest
- public class MultipledatasourcesApplicationTests {
- /*
- * We will be using mysql databases we configured in our properties file for our tests
- * Make sure your datasource connections are correct otherwise the test will fail
- * */
- @Autowired
- private MemberRepository memberRepository;
- @Autowired
- private CardHolderRepository cardHolderRepository;
- @Autowired
- private CardRepository cardRepository;
- private Member member;
- private Card card;
- private CardHolder cardHolder;
- @Before
- public void initializeDataObjects(){
- member = new Member();
- member.setMemberId("M001");
- member.setName("Maureen Mpofu");
- cardHolder = new CardHolder();
- cardHolder.setCardNumber("4111111111111111");
- cardHolder.setMemberId(member.getMemberId());
- card = new Card();
- card.setExpirationMonth(01);
- card.setExpirationYear(2020);
- card.setName(member.getName());
- }
- @Test
- public void shouldSaveMemberToMemberDB() {
- Member savedMember =memberRepository.save(member);
- Optional<Member> memberFromDb= memberRepository.findById(savedMember.getId());
- assertTrue(memberFromDb.isPresent());
- }
- @Test
- public void shouldSaveCardHolderToCardHolderDB() {
- CardHolder savedCardHolder =cardHolderRepository.save(cardHolder);
- Optional<CardHolder> cardHolderFromDb= cardHolderRepository.findById(savedCardHolder.getId());
- assertTrue(cardHolderFromDb.isPresent());
- }
- @Test
- public void shouldSaveCardToCardDB() {
- Card savedCard = cardRepository.save(card);
- Optional<Card> cardFromDb= cardRepository.findById(savedCard.getId());
- assertTrue(cardFromDb.isPresent());
- }
- }
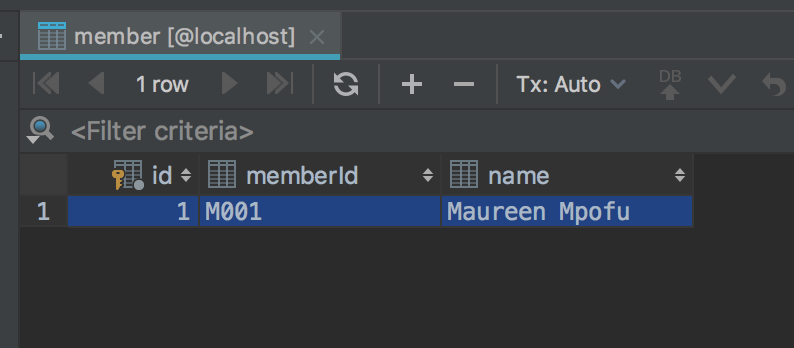
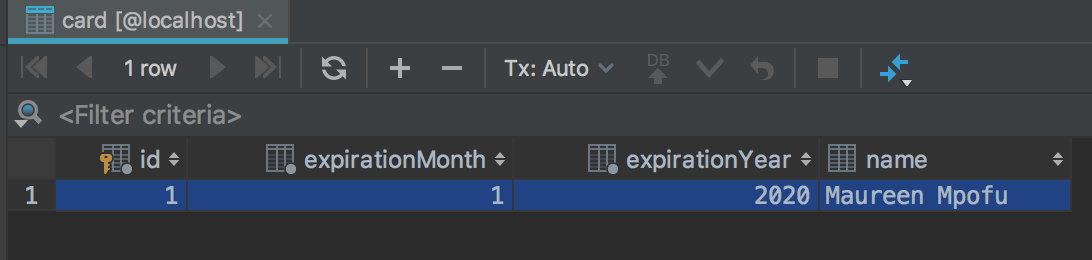
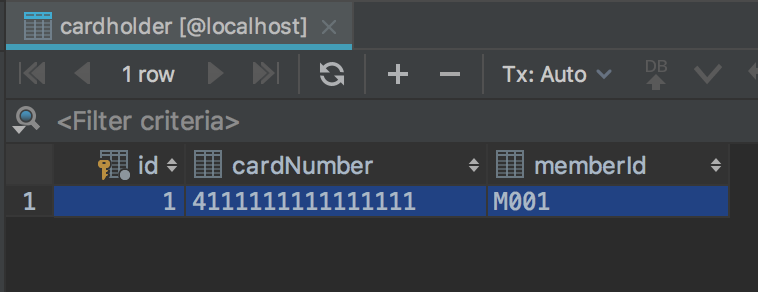
Our test cases passed and the database tables recorded the data persisted via the application(indicated by the screenshots below).
Member Database
Card Database
CardHolder Database
Conclusion
When dealing with just one datasource and Spring Boot, data source configuration is simple. Spring Boot can provide a lot of auto configuration.
However, if you need to connect to multiple datasources with Spring Boot, additional configuration is needed.
You need to provide configuration data to Spring Boot, customized for each data source.
The source code of our sample application is available on GitHub. Please update the datasource to your own needs.
Reference:
- Springframework.guru - How to Configure Multiple DataSource in a Spring Boot Application
- Spring.io - How to configure a datasource
- Udith.me - Configuring Multiple DataSources with Spring Boot
- Stackoverflow.com - Implement JPA Transaction Manager in Spring Boot